DIY Twist Knot Headband
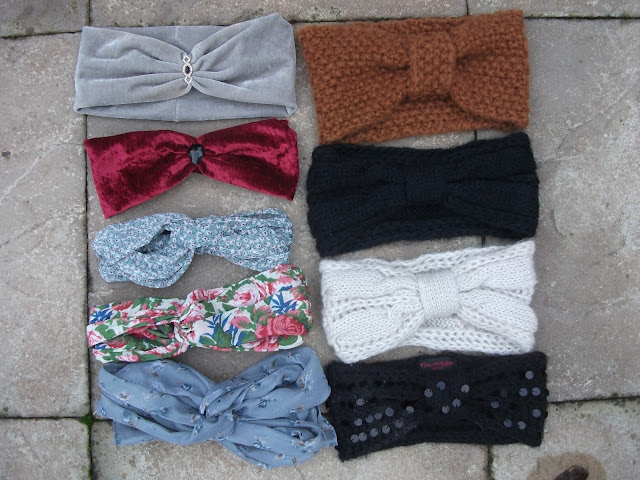
So my regular followers will know I own a tonne of twist headbands:
For this headband you will need:
- stretchy jersey fabric 16 inches by 24 inches
- chalk
- measuring tape/ruler
- scissors
- pins
- Needle and thread OR Sewing machine
1) The first thing you will need to do is cut your fabric in half, leaving you with two pieces 8 by 24 inches.
2) Next you need to fold each piece in half, pin in place and straight stitch the full 24inch length
3) You should now have two tubes of fabric, which need turning inside out to hide the rough/sewn edge
4) Then one of the pieces needs to be placed on top of the other like in the image below
2) Next you need to fold each piece in half, pin in place and straight stitch the full 24inch length
3) You should now have two tubes of fabric, which need turning inside out to hide the rough/sewn edge
4) Then one of the pieces needs to be placed on top of the other like in the image below
5) The vertical piece then needs to fold in half, enclosing the horizontal. The horizontal piece also needs to fold in half also.
6) You should end up with some thing that looks like this:
7) give the two ends a pull to create the knot like middle
8) Gather all the ends together and sew in place.
9) After sewing, turn the headband inside-out so the sewn edges are on the inside.
And voilà!
9) After sewing, turn the headband inside-out so the sewn edges are on the inside.
And voilà!
Alternatively:
This one takes just a minute, you will need:
- A Jersey Headband
- Needle and Thread
- Sew on gem (optional)
1)Gather the front of a basic headband and stitch in place
2) Simply wear it like this or add a little sew on bead for more detail:


Might try this! So handy for a messy hair day x
ReplyDeleteI really love the velvet one, I'm going to make one of these x
ReplyDeletelooove turbans, thanks for the DIY tip!
ReplyDeletef XOXO
amazing! Going try one of these! Xxx
ReplyDeleteAdore the velvet red one! You certainly have a collection. Amazing tutorial.x
ReplyDeleteoh wow - might have to give this a whirl, they look so pretty
ReplyDeletehttp://blogoftheprettythings.blogspot.com/
xxx
Love your selection, they seem quite straight forward to make, wish turbans suited me :( x
ReplyDeleteHi! I want to put your blog links among cool blogs that I nominate for my visitors to see. But for this I need your permission ^ ^. You let me?
ReplyDeleteMy blog is: hikikah.blogspot.com
If you want to follow him... hahahaha.
The blogs cool are listed on the tab: ETC .
Simple and cute, I love it! Now if only they looked as good on me as they do on you girly!
ReplyDeleteKaylee
xo
OO i love making these!!! I always make them for my friends..very cool!
ReplyDeletehttp://www.frankvinyl.com
i have always admired all your turbans in your outfit post! and this DIY is awesome! i love the first way of doing it, totally going to have to try it!!!!
ReplyDeletex
shopstyleconquer.blogspot.com
shopstyleconquer.blogspot.com
shopstyleconquer.blogspot.com
Wow! This is such a wonderful idea... Thanks for sharing this with us!
ReplyDeleteMuch love from the SABO SKIRT girls!
SHOP: www.saboskirt.com
BLOG: www.saboskirt.blogspot.com
Love turbans on other people but they don't seem to suit me : ( shame as I'm majorly lusting after your velvet one
ReplyDeletexx
ah that's so cool! x
ReplyDeletewhat a cute little tutorial! xoxo
ReplyDeleteO WOW love these! Now following you - please check us out @frankanddoll.com. Thanks doll x
ReplyDeletefab DIY thanks for sharing
ReplyDeleteI love all of them but the velvet one it's amazing! Great DIY!X
ReplyDeleteSo happy you all like my tutorial! :)
ReplyDeletex
LOVE turbands! i have two, but i never wear them, i think they don't look as good on short hair :(
ReplyDeletethat velvet one is amazing.
www.fashionmeasmile.com
X
I am doing this! thanks
ReplyDeletewww.lookwhatigot.co.uk
Aw so adorable. Thanks for sharing this. I love DIYs. I will try this. It looks so handy.
ReplyDeleteI love your style as well as your blog.
I'm your new follower.
Pls check out mine sometimes
www.thesanktuary.blogspot.com
kisses
This is a great tutorial :)
ReplyDeleteA great tutorial! I love my own velvet turban for when I'm having a greasy hair day!
ReplyDeleteI never realised they were so simple to make
Leigh xo
http://leightravers.blogspot.com
love this <3
ReplyDeletei like your style <3
ReplyDeletefollow you!
I was MIA for quite some time so I've only just seen that you did the turban's! Thank u so much, Chelsea; will definitely be trying them out ☺
ReplyDelete